- Using a USB-C male to USB-A male cable (data cable) and a USB-C male to USB-C male (power cable) mentioned the hardware requirements from the Getting Started guide, connect the power cable to the power port of your Raspberry Pi 4 power HAT case to your 12v power supply. Connect the USB-C side of the data cable to the lower USB-C port marked "Data" in the image below. There are two USB-C ports on the power HAT case, but the top one will not transfer data.

- Wait about 5 minutes after initially connecting the power. The first boot will expand the SD storage to match your SD card's capacity which can take a few minutes. You can then connect the Raspberry Pi 4 to your Tesla using the USB-A end of the data cable.

- Your Sentry DashCam Bridge is now ready to use with Sentry DashCam App!
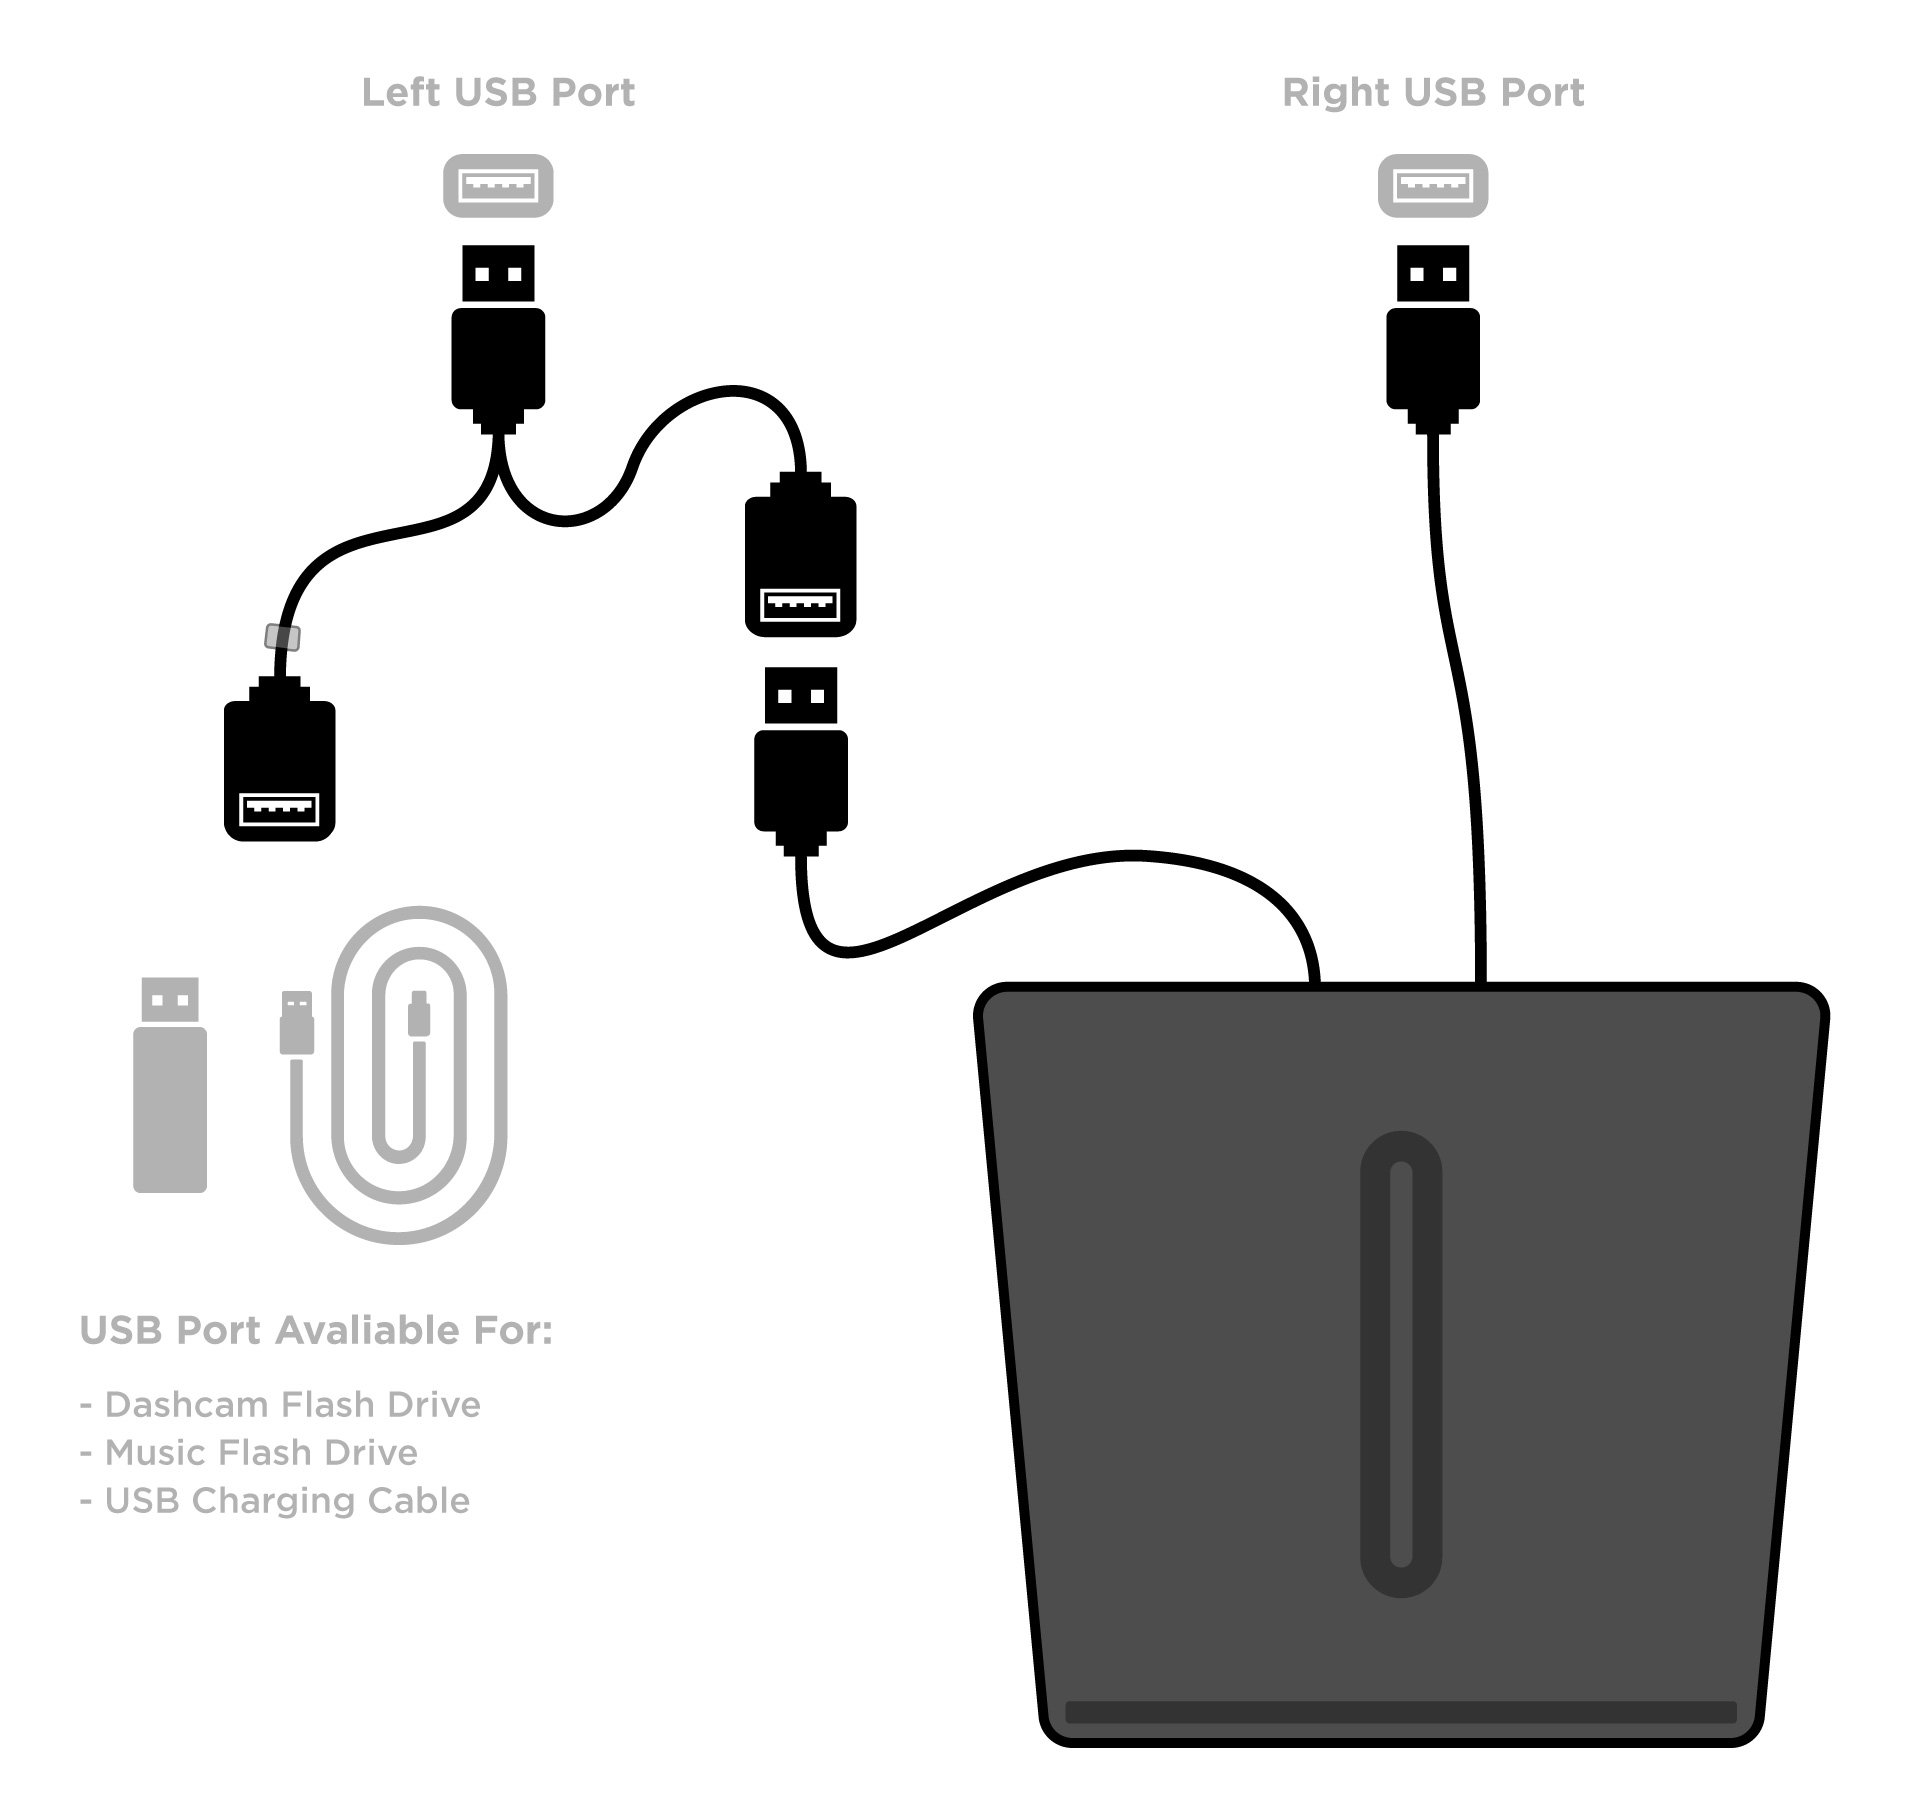
If you are using both USB ports already for something like a dual phone wireless charger like the Nomad Wireless Charger, you may want to try a USB splitter so that you can still have use of both USB ports for the purpose of powering devices.